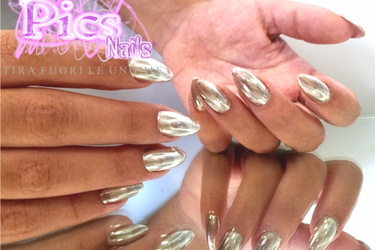
Mirror Nails is one of the great News of the Nails sector, one of the latest Trends and the most loved by those who want to have always perfect and trendy Hands! But how to realise a professional and flawless Mirror Nail Art?
We talk about it in this new deepening of our Nails Blog, showing You in a clear Step by Step which are the Phases of a correct application of the new Pics Nails Mirror Powder!
CLICK AND BUY THE MIRROR POWDER!
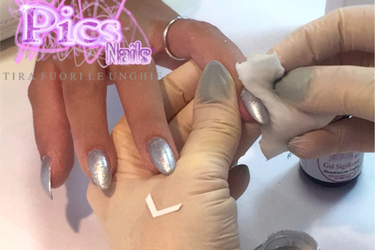
We begin our Mirror Nails Step-by-Step by making a small clarification: the Mirror Powder - which can be used both in the case of a work in Gel Nails that on Gel Nail Polish - can be applied on the Colour conveniently Catalysed in Lamp and Degreased with a square of cotton pads soaked in Nail Cleaner (as in the case of the photo here)
However, in order to obtain an even more professional and perfect finish, our advice is to Seal the Colour and apply the Mirror Powder only after having sealed...exactly as we will see in this clear Step by Step!
In the case of using the One Step Gel Polish, instead, remember that it is necessary to always Seal: we cannot therefore apply our Mirror Powder after the Colour but always and only after having Sealed and suitably Degreased.
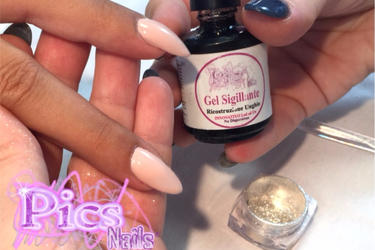
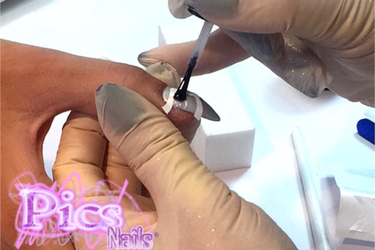
We proceed by Sealing our work with the Gel Top Coat or with the Clear Gel Nail Polish (in the case of an application on a "classic" Gel Nail Polish or One Step Gel Polish) or with the Uv Sealing Gel such as in this case, and we Degrease the Nail Surface to eliminate the sticky dispersion layer that would compromise the proper Application of our Mirror Powder.
Also for this first Step we have an important Pics Nails Advice to give you: to obtain a better effect you can opt for the Led Sealing Gel Pics Nails , that leaves no dispersion layer and which therefore does not need to be then Degreased!
CLICK AND BUY THE UV-LED SEALING GEL PICS NAILS!
Let’s proceed, then, by Sealing our Colour!
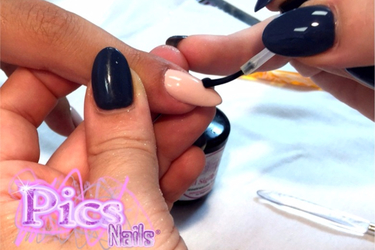
Remember to Seal the nail surface in an uniform way, avoiding contact with the cuticles and "rolling up" the free corner of the Nail...just as we would normally do in a Phase of final Sealing of one of our Creations!
Once concluded the Application of the Uv Sealing Gel, proceed Catalysing in UV or LED Lamp and finally Degreasing the nail surface with our Nail Cleaner (in the case of Led Sealing Gel it will not be necessary).
Obviously, as for the other Nail Arts, also for the realisation of Mirror Nails you can let your imagination and skills run riot!
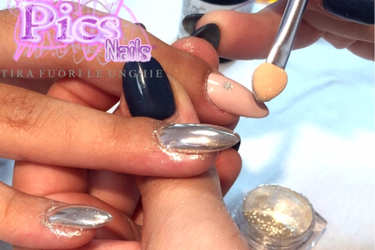
It is not necessary, therefore, that we should apply the Mirror Powder over the entire surface of the nail, but You could - as in the next picture - "isolate" only a part so as to obtain a “Game” of different effects on the same Nail!
In this case, for example, the Uv Sealing Gel has been applied only on a portion of the Surface of the Nail on which will then be applied the Mirror Powder!
But let’s finally see how to apply our Mirror Powder!
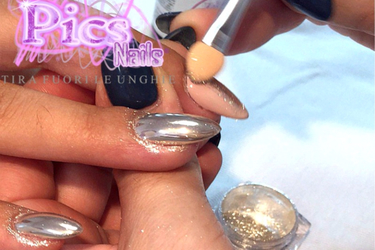
We use a Brush - such as the Brush which is supplied for free with the Purchase of our Mirror Powder Pics Nails - slightly dipping it in the Glitter Nail Dust Jar.
Thus we will get a small amount of Mirror Powder and we will simply create vertical dots at the centre of the nail surface, as shown in the Photo here!
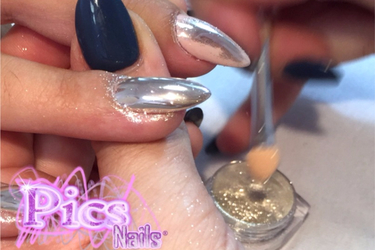
Once you created the dots, always with the help of our Brush we connect them by sprinkling the Mirror Powder on the Nail Surface.
We shall now proceed with fast and slight movements, carrying the Mirror Powder over the entire nail in an uniform way: in this sense, the use of the appropriate brush and not other tools, is important because this type of Brush allows us to work with precision and prefectly spread the Mirror Powder!
Of course, if we realise that the used Mirror Powder is not enough, we can still pick up a small amount from its Jar and proceed as in the previous Step to complete the most of our work!
We then still get a bit of Mirror Powder and we continue to spread it on the nail surface until it seems completely covered and in a completely uniform manner!
Here’s again a valuable Pics Nails Advice: who wants to obtain a more delicate Mirror Nail Art or wants that the used Colour can be visible, can use a glove and proceed by gently massaging the Mirror Powder with the finger on the surface of the nail.
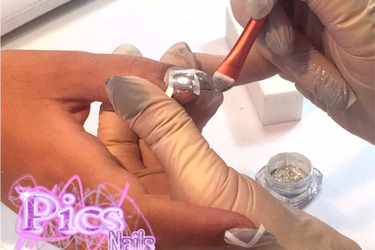
In the case - as we have seen before - we decide not to want to obtain a Mirror Effect on the entire Nail, we will proceed by applying the Mirror Powder only on the part of the Nail surface that We have chosen, working as just indicated.
Always with the help of our Brush for the Application, we get a small amount of Mirror Powder and we set it where we decided, then gently coating it in the established area.
CLICK AND BUY THE MIRROR POWDER PICS NAILS!
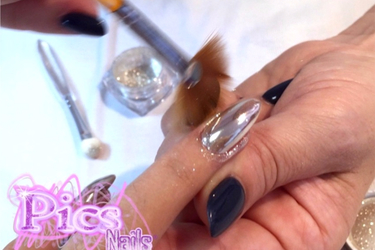
Once concuded this important Application Step, do not worry if a bit of Mirror Powder has gone on the cuticles or on the fingertip...it is normal!
With the aid of a Nail Cleaning Brush we go to eliminate any excess Mirror Powder, before proceeding with the next Step!
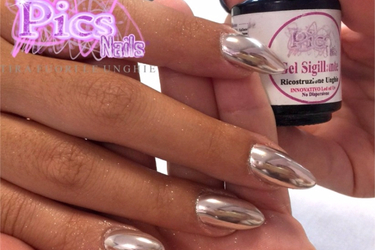
Let’s prepare to conclude our Mirror Nails!
Once again we use our Uv Sealing Gel - or the Led Sealing Gel - to close and protect the work done so far!
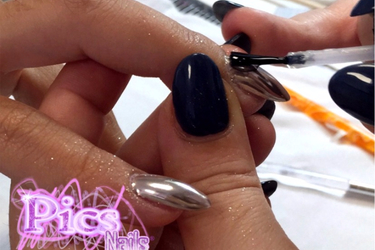
We apply the Uv Sealing Gel using the integrated Brush in its bottle and we coat it on the surface of the nail to carry out our Mirror Nails!
Once again, we suggest you use to pay great attention, avoid touching cuticles and always remembering to roll up the free corner of the Nail to perfectly "close" what You realised!
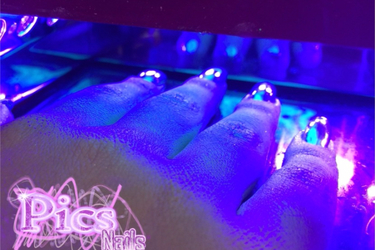
Once completed the coat of our Uv Sealing Gel, we leave it catalyse in UV or LED lamp to dry, fixing perfectly.
Also for this final Step, our advice is to check that all the fingers are well exposed to the light of our Lamp and to periodically check that the bulbs are not finished, eventually proceeding with their replacement.
After having concluded the Catalysis Phase, we Degrease our beautiful Mirror Nails with a square of cotton pads soaked in Nail Cleaner (in case it is used the Led Sealing Gel it will not be necessary to degrease).
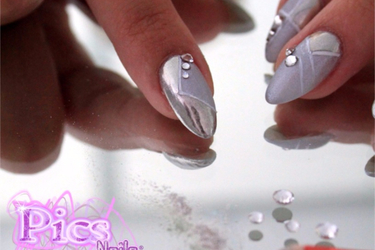
We arrived at the conclusion of our work: an incredible Mirror Nail Art, made in few and simple Steps...for a really amazing finish!
We remind you that the new Mirror Powder Pics Nails is available in Silver Color but it can be applied - as we have shown in this Step by Step - on different colors, to obtain different chromed effects!
Once again we just have to wish you good Work and have fun, to give life to your Mirror Nails ever more original and perfect!


